Sunday, August 28, 2022

Log Cabin Toss Quilt Along - Week 3

Week 3 of the Log Cabin Toss Quilt Along is here.

Here at the halfway mark and very excited to see that by the end of this week your Quilt Tops will be all ready to sewn together in week 4.


It is amazing to see lots of Quilts starting to come together and all these beautiful fabric choices becoming gorgeous Log Cabin Toss Quilt tops.


This week we are working on cutting up all of your blocks and arranging them.


This is where the magic of this quilt begins to show.  Taking each of your completed blocks you are going to carefully follow the instructions for how to cut these into the required smaller blocks ready for construction.


When it comes to arranging them – take your time.  You can follow the block orientation as I have done, or you can change it up to suit your fabrics and colours. Don’t be afraid to rotate a block if you have colours that are next to each other and aren’t working out as you planned.  


So this week’s task is to post a pic to Instagram using the hashtags #logcabintossqal,#logcabintossquilt and #tiedwitharibbonpatterns of you cutting up your blocks together or some of your blocks all sewn and arranging them.  Get creative, I have loved seeing the posts and reels you have been putting up so far.  It helps to tag me - @tiedwitharibbon to make sure I see your post and of course your Profile has to be set to Public for me to see it.  


Happy Quilting

Jemima x


Get organised for your next quilt project with these Swatch cards.  Keep all the details listed of your project, take this card easily to the fabric shop if you need to purchase more fabric for you project, see all your colours together. 

Sunday, August 21, 2022

Log Cabin Toss Quilt Along - Week 2

Week 2 is here of the Log Cabin Toss Quilt Along and it has been so inspiring to see all the Fabric Pulls all ready in anticipation of being made into a quilt.


What an amazing start we have gotten off to with the Log Cabin Toss Quilt Along - it is so exciting to see so many fabric pulls and cut out quilts block pieces showing up already.  I am seriously in love with lots of these that they make me want to make another one - or ten!  Have you checked out the #logcabintossqal and #logcabintoss hashtags?


If you are wanting to join in - it's not too late at all (you can join in at any point). To participate all you need to join in is:


1. Get the Log cabin Toss Quilt pattern here


2. Sign up for the Newsletter here  


3. Post your pics from the weeks prompts on Instagram to #logcabintossqal, #logcabintossquiltand #tiedwitharibbonpatterns.  It also helps to tag me - @tiedwitharibbon to make sure I see your post.


You can get all the details for the Log Cabin Toss Quilt Along Week 1 here


Now that you have chosen and cut out your fabrics, this week you are going to be working on making blocks.  


Tips for sewing on the strips


Pinning


Log Cabin blocks are notorious for one thing – as you add each side the block can start to become wavy and vary in the size which is highly noticeable as you go to add the next strip. The thing with log cabin blocks is to treat them exactly the same way as adding borders to a quilt.


Before you sew a strip to the log cabin block, fold the strip in half (so the short ends meet) and finger press a crease at the centre length, then fold the side of the block you will be sewing the strip to in half and finger press a crease.  Before you pin the strip to the block, line up and pin the marks and pin the top and bottom of the strip.  This will ensure the strip is evenly distribute along your block so it will sit nice and flat and not stretch as your block grows.


You can see this reel here I made about adding borders and the concept is exactly the same for log cabin strips (there is no need to measure the sides however for your log cabin blocks).


Setting your seams

Be sure to set your seams when pressing to ensure nice and straight sewn lines.  


Do you ever have trouble with your seams being wonky after pressing? 
Here is a simple tip for straight seams every time. 

1. Press the seam first as you have sewn it. 

2. Then press your seam in the direction you want it to lay.

This is called “setting your seams” and allows the top and bobbin thread to lock within the fabric from pressing, making for a much straighter seam. 


So this week’s task is to post a pic to Instagram using the hashtags #logcabintossqal,#logcabintossquilt and #tiedwitharibbonpatterns of you sewing your blocks together or some of your blocks all sewn.  Get creative, or even your cut fabrics all laid out beautifully.  It helps to tag me - @tiedwitharibbon to make sure I see your post and of course your Profile has to be set to Public for me to see it.  


Happy Quilting

Jemima x 

Sunday, August 14, 2022

Log Cabin Toss Quilt Along - Week 1

Welcome to week 1 of the Log Cabin Toss Quilt Along.  I am so excited you will be joining in.


Designed to be fun, casual and relaxed so that you can work through making your very own Log Cabin Toss quilt over the coming 5 weeks - I am looking forward to having you join in. Everything you need to get you started is here along with the Schedule for the coming 5 weeks.


If you are wanting to join in - it's not too late at all (you can join in at any point). To participate all you need to join in is:


1. Get the Log cabin Toss Quilt pattern here


2. Sign up for the Newsletter here  


3. Post your pics from the weeks prompts on Instagram to #logcabintossqal, #logcabintossquiltand #tiedwitharibbonpatterns.  It also helps to tag me - @tiedwitharibbon to make sure I see your post.


This week is all about choosing and deciding which fabric you will use to make your Log Cabin Quilt as well as getting it cut up.  Make sure to check out the #logcabintossquilt hashtag for inspiration.


Week 1 - Selecting your Fabric

This weeks task is all about selecting and choosing the fabric you would like to make your Quilt from. Post a pic to Instagram, using the above hash tags of your fabric pull or quilt planning to show us what you will be making your Log Cabin Toss Quilt from and to be in the running for this weeks prizes.


This is where the sky is the limit - whether you choose Solids or Prints this quilt works.  You can grab fabrics from your stash or use a collection.


Make sure you check out my last Blog Post – here you will find my tip for how I chose the fabrics for my Log Cabin Toss Quilt.


You can also see here in this Reel I made how I do this.


Prints

For this quilt - multi directional prints work best and are easiest.  Geometrics work well as well as smaller scale prints.  Florals and novelty fabrics are especially good for this quilt.  


Solids

Solids work so well for this Quilt and the choices of different Fabric Company Solids is huge.  One way to do this is head over to Pinterest and search Colour Palettes - this gives you lots of boards with a selection of colours already that co-ordinate and work well together.  From here you can pick and choose solids for any colour palette you like.


Scrappy

This design also works perfectly to pull fabrics from your stash if you want to go with a scrappy vibe.  You will really make a dent in your scrap bucket with this quilt. 


Cutting your Fabric

Now that you have chosen your fabrics, this week is also all about cutting into them.  


So this weeks task is to post a pic to Instagram using the hashtags #logcabintossqal,#logcabintossquilt and #tiedwitharibbonpatterns of the fabrics that you intend to use for your own Two Hearts Quilt or maybe them cut up.  It could be you planning out your choices or a lovely bundle of what you have chosen - get creative, or even your cut fabrics all laid out beautifully.  It helps to tag me - @tiedwitharibbon to make sure I see your post and of course your Profile has to be set to Public for me to see it.  


I'm so excited to see what fabrics and colours you are choosing - no matter what you go with these will look bold and beautiful in this modern design.


Happy Quilting

Jemima x 

Tuesday, August 9, 2022

The easiest way to choose fabric for a quilt


Here is my tip for the easiest way to choose fabric for a quilt.  This will really help grow your colour confidence.

Choosing fabric for a quilt can be a daunting task. This tutorial will show you how to choose fabric for a quilt easily and in no time at all!


Quilts can take a long time to make but we do it because we love it, right? No matter how much you love something though, nobody wants to spend hours making a quilt only to find the colours and patterns of the fabrics you chose don’t quite work together. It can be very disappointing!


Curating a collection of fabric with colours and prints that work together doesn’t have to be a difficult or time consuming task if you follow these simple steps.


Step 1 - Choose your Backing fabric first and use this as your inspiration fabric. You can see here in this pic above that I started with this gorgeous Art Gallery Floral Print for my backing fabric.  It contains lots of beautiful colours that I know will work well for the fabrics for the quilt top.


Step 2 - Then from your stash or at your LQS use the colours within the print to choose the fabrics for the Quilt top.  You will also find along the selvedge of most prints a colour guide (these can be circles or little motifs that show each colour used in the fabric)


Step 3 - You can see here how I chose this gorgeous floral print first. Then I worked to pull matching colours found in the design of the leaves and flowers. With the beautiful design, the colour palette is done for you so it makes it much easier to choose fabrics for your quilt with an idea of what already works together.


You can also see here in this Reel the process.


This technique works both at home and in-store. The good thing is that it’s fast, which means if you’re strapped for time you can duck out to your favourite quilt shop and be home again cutting up fabric before you know it.


If you’re online shopping it may be hard to make sure the colours of the fabrics are right for each other. One way to get around this is by sticking with one fabric designer and working across collections.


Check out these patterns that I have designed using this exact process.


Happy Quilting

Jemima x 

Friday, July 29, 2022

Log Cabin Toss Quilt Along - Getting Ready


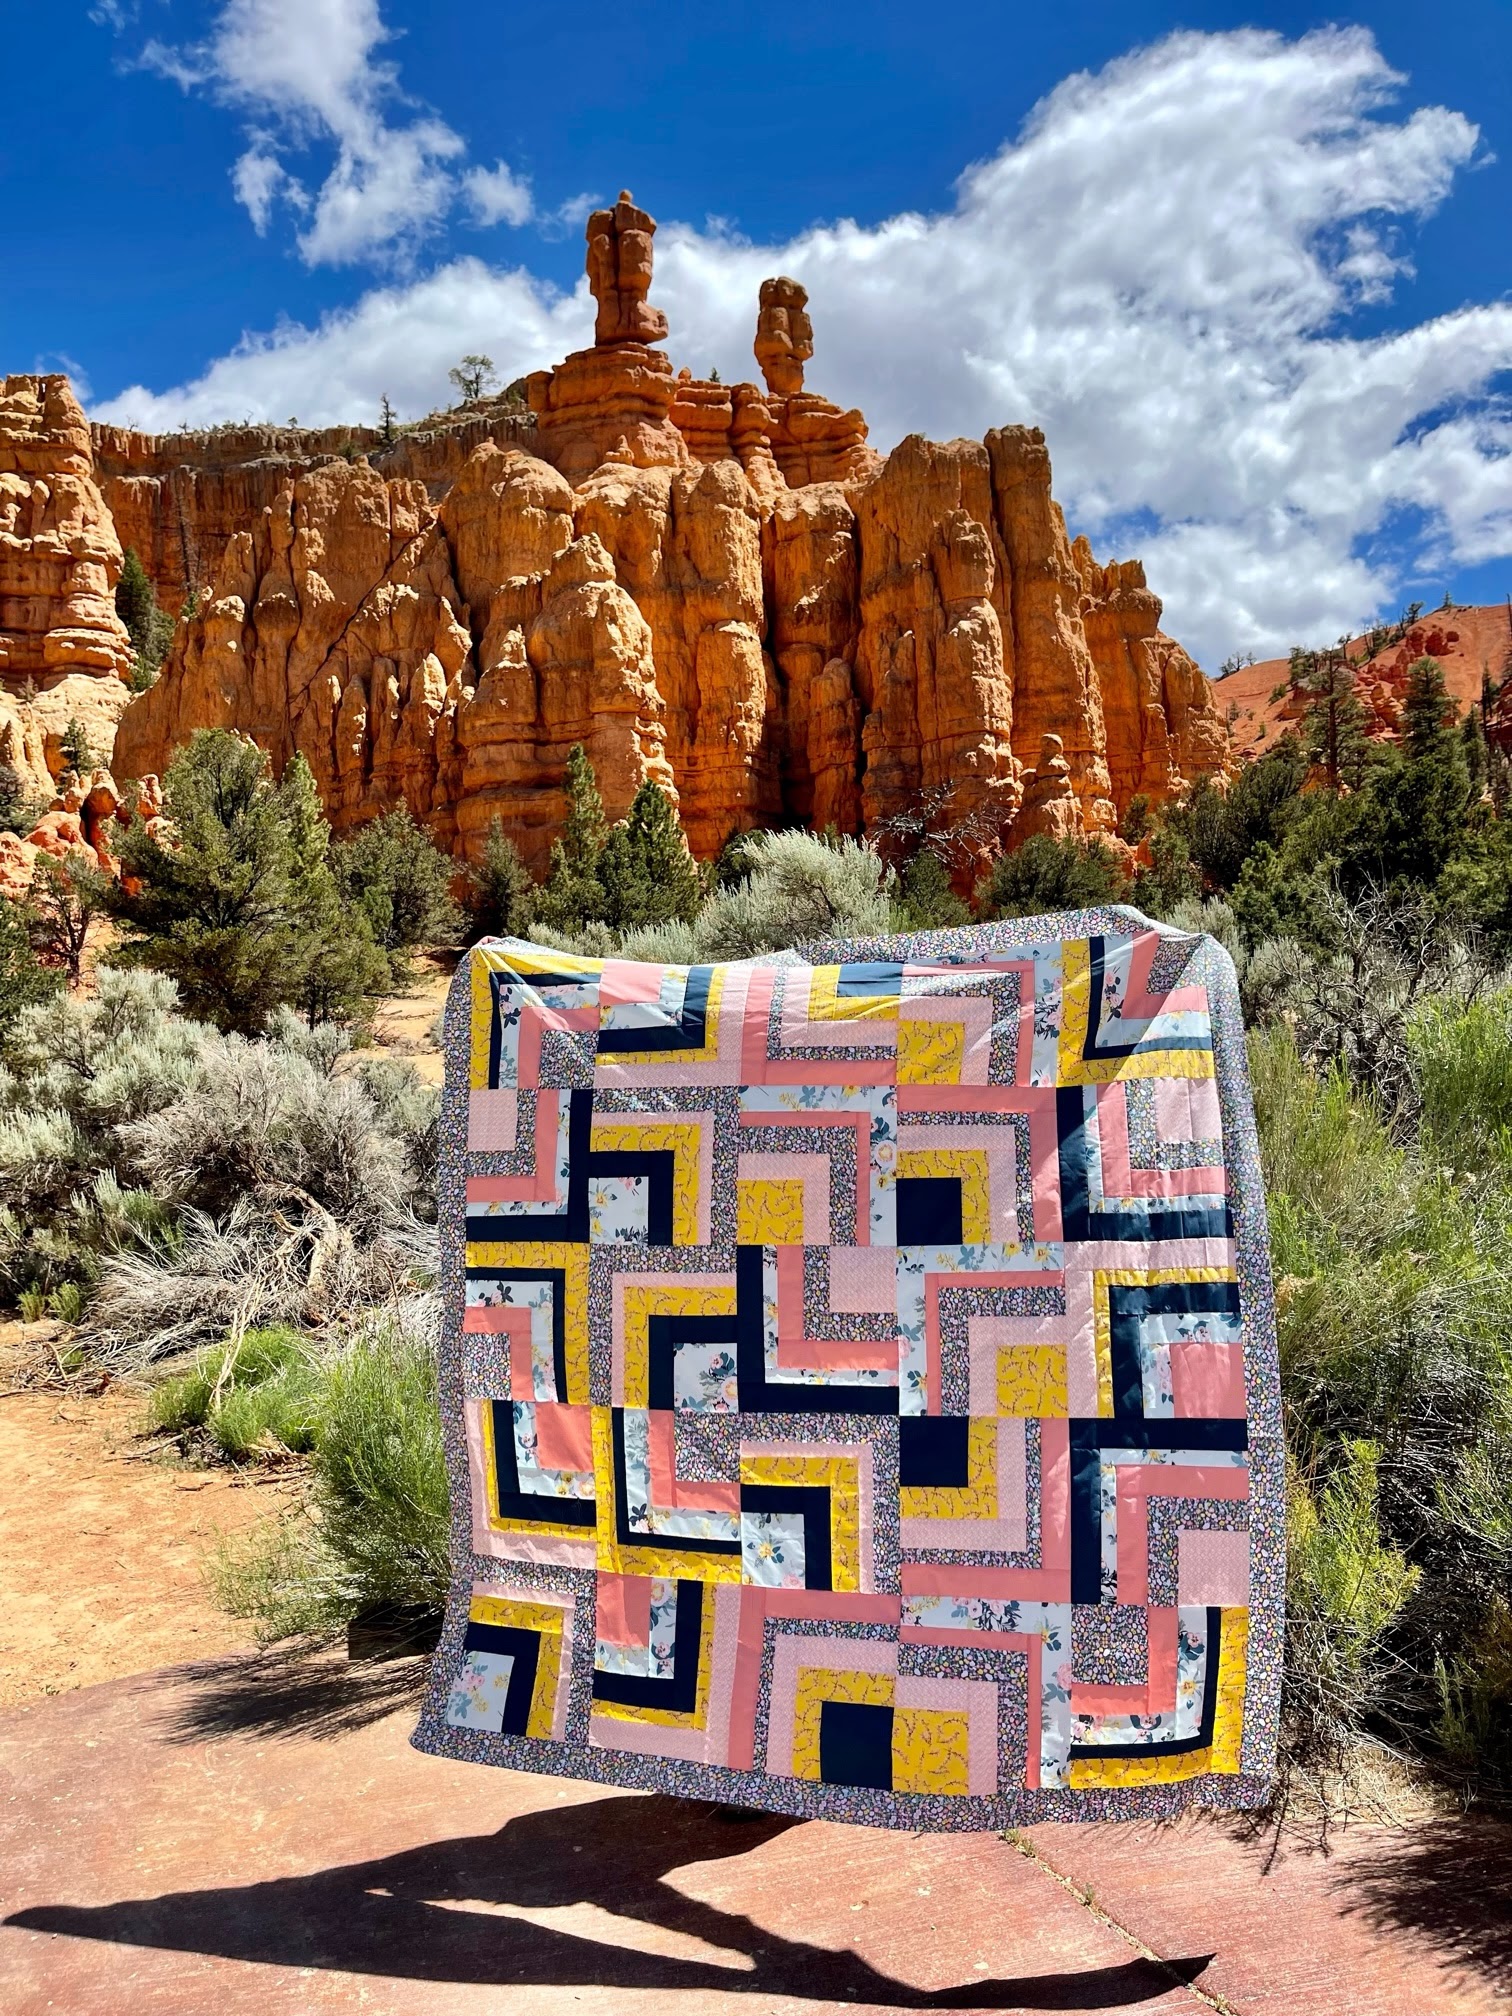
I am so excited to finally release the Log Cabin Toss Quilt.  This design is fun, bold and comes together very quickly with the unique cutting technique of this design. I know that you guys are going to love making your very own version of this Quilt. 


You can choose to feature one Print style fabric or make it from any fabric collection you choose.  There is even a Bonus Scrappy Block option, so this makes it the perfect quilt to make a dent in your scrap bucket. 


Starting August 15th we will be kicking off the #logcabintossqal


The Log Cabin Toss Quilt comes in three sizes – Baby Quilt 40.5in x 40.5in (103cm x 103cm), Lap Quilt 64.5in x 64.5in (164cm x 164cm) and a Queen Quilt 88.5in x 88.5in (225cm x 225cm). 


Included in the pattern is a Colouring Page to help you work out your colour placement, you can also use this to plan out your machine quilting.


The #logcabintossqal will be held over 5 weeks - this gives you plenty of time to get yourself all organised before hand and has that causal approach to the timing so that it is not overwhelming for anyone.  I will be hosting it over on Instagram using the #logcabintossqal and #tiedwitharibbonpatterns hashtags.  There will be prizes from some fantastic sponsors, Newsletters each week with information about each weeks' task, along with tips and tricks to help you make your #logcabintossquilt. 


So no matter where in the world you are you can Sew Along with us. 


LOG CABIN QUILT ALONG DETAILS


Dates – August 15th – September 12th


Duration - 5 weeks


HOW TO PARTICIPATE


Get a copy of the Log Cabin Toss Quilt


Sign up for the Newsletter


Follow me @tiedwitharibbon and post your progress pics to #logcabintossqal

#logcabintossquilt AND #tiedwitharibbonpatterns


SUPPLIES NEEDED


Here are the Fabric Requirements for this Quilt


SCHEDULE


Week 1 - Choosing and cutting your fabric

Week 2 – Making blocks

Week 3 – Cutting up blocks and arranging

Week 4 – Sewing Quilt top

Week 5 - Completing your Quilt Top, Preparing for Quilting and Binding 


PRIZES


There is an amazing Line up of Sponsors who will be offering prizes.  So no matter which size you are making you can still be in the running. Remember you must use the hashtags #logcabintossqal, #logcabintossquilt and #tiedwitharibbonpatterns to be in the running.


KITS


Head to the following stores to grab these Log Cabin Toss Quilt Kits


The Log Cabin Toss Quilt is suitable for Patterned prints just as much as Solids.  You can check out the #logcabintossquilt hash tag for lots of inspiration already from quilts already made.  


Make sure you are signed up to the Log Cabin Toss QAL Newsletter.  Several stores also have Kits for the Log Cabin Toss Quilt in a variety of different patterns so make sure you get this Newsletter.


So get excited and start to gather your supplies.

The #logcabintossqal is not to be missed.


Jemima x x

Sunday, July 17, 2022

The Log Cabin Toss Quilt is here


The Log Cabin Toss Quilt pattern is here.
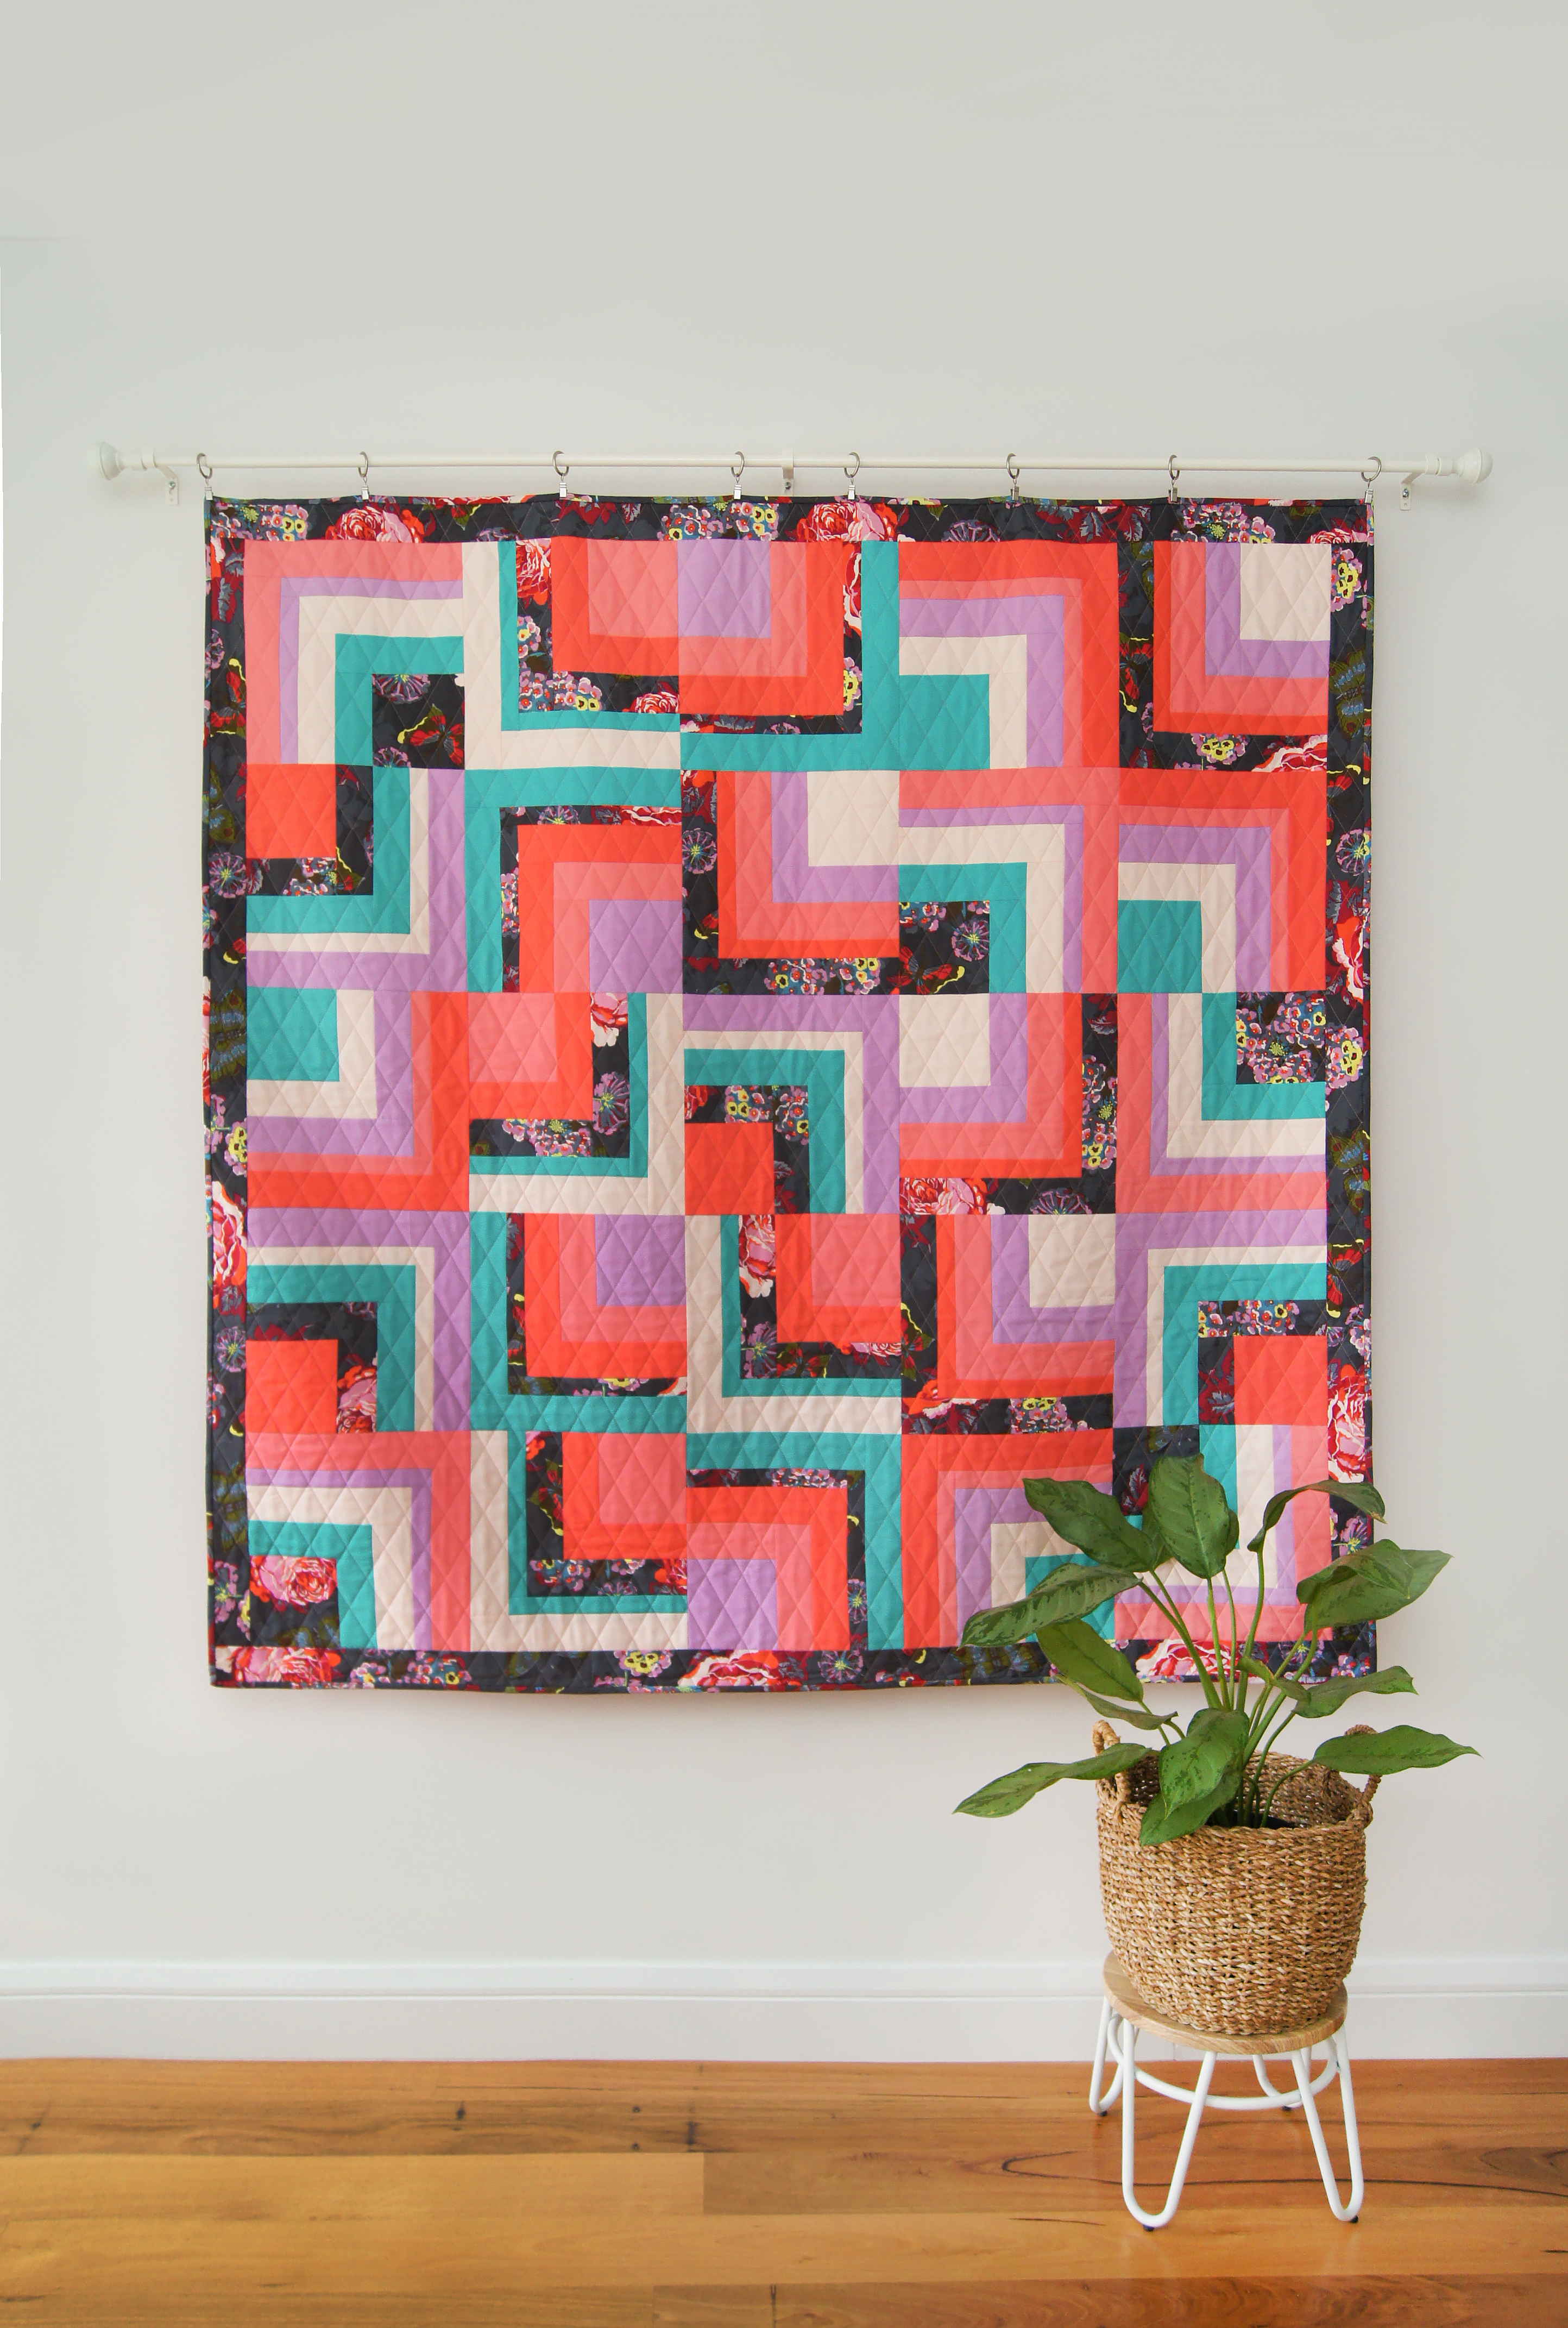
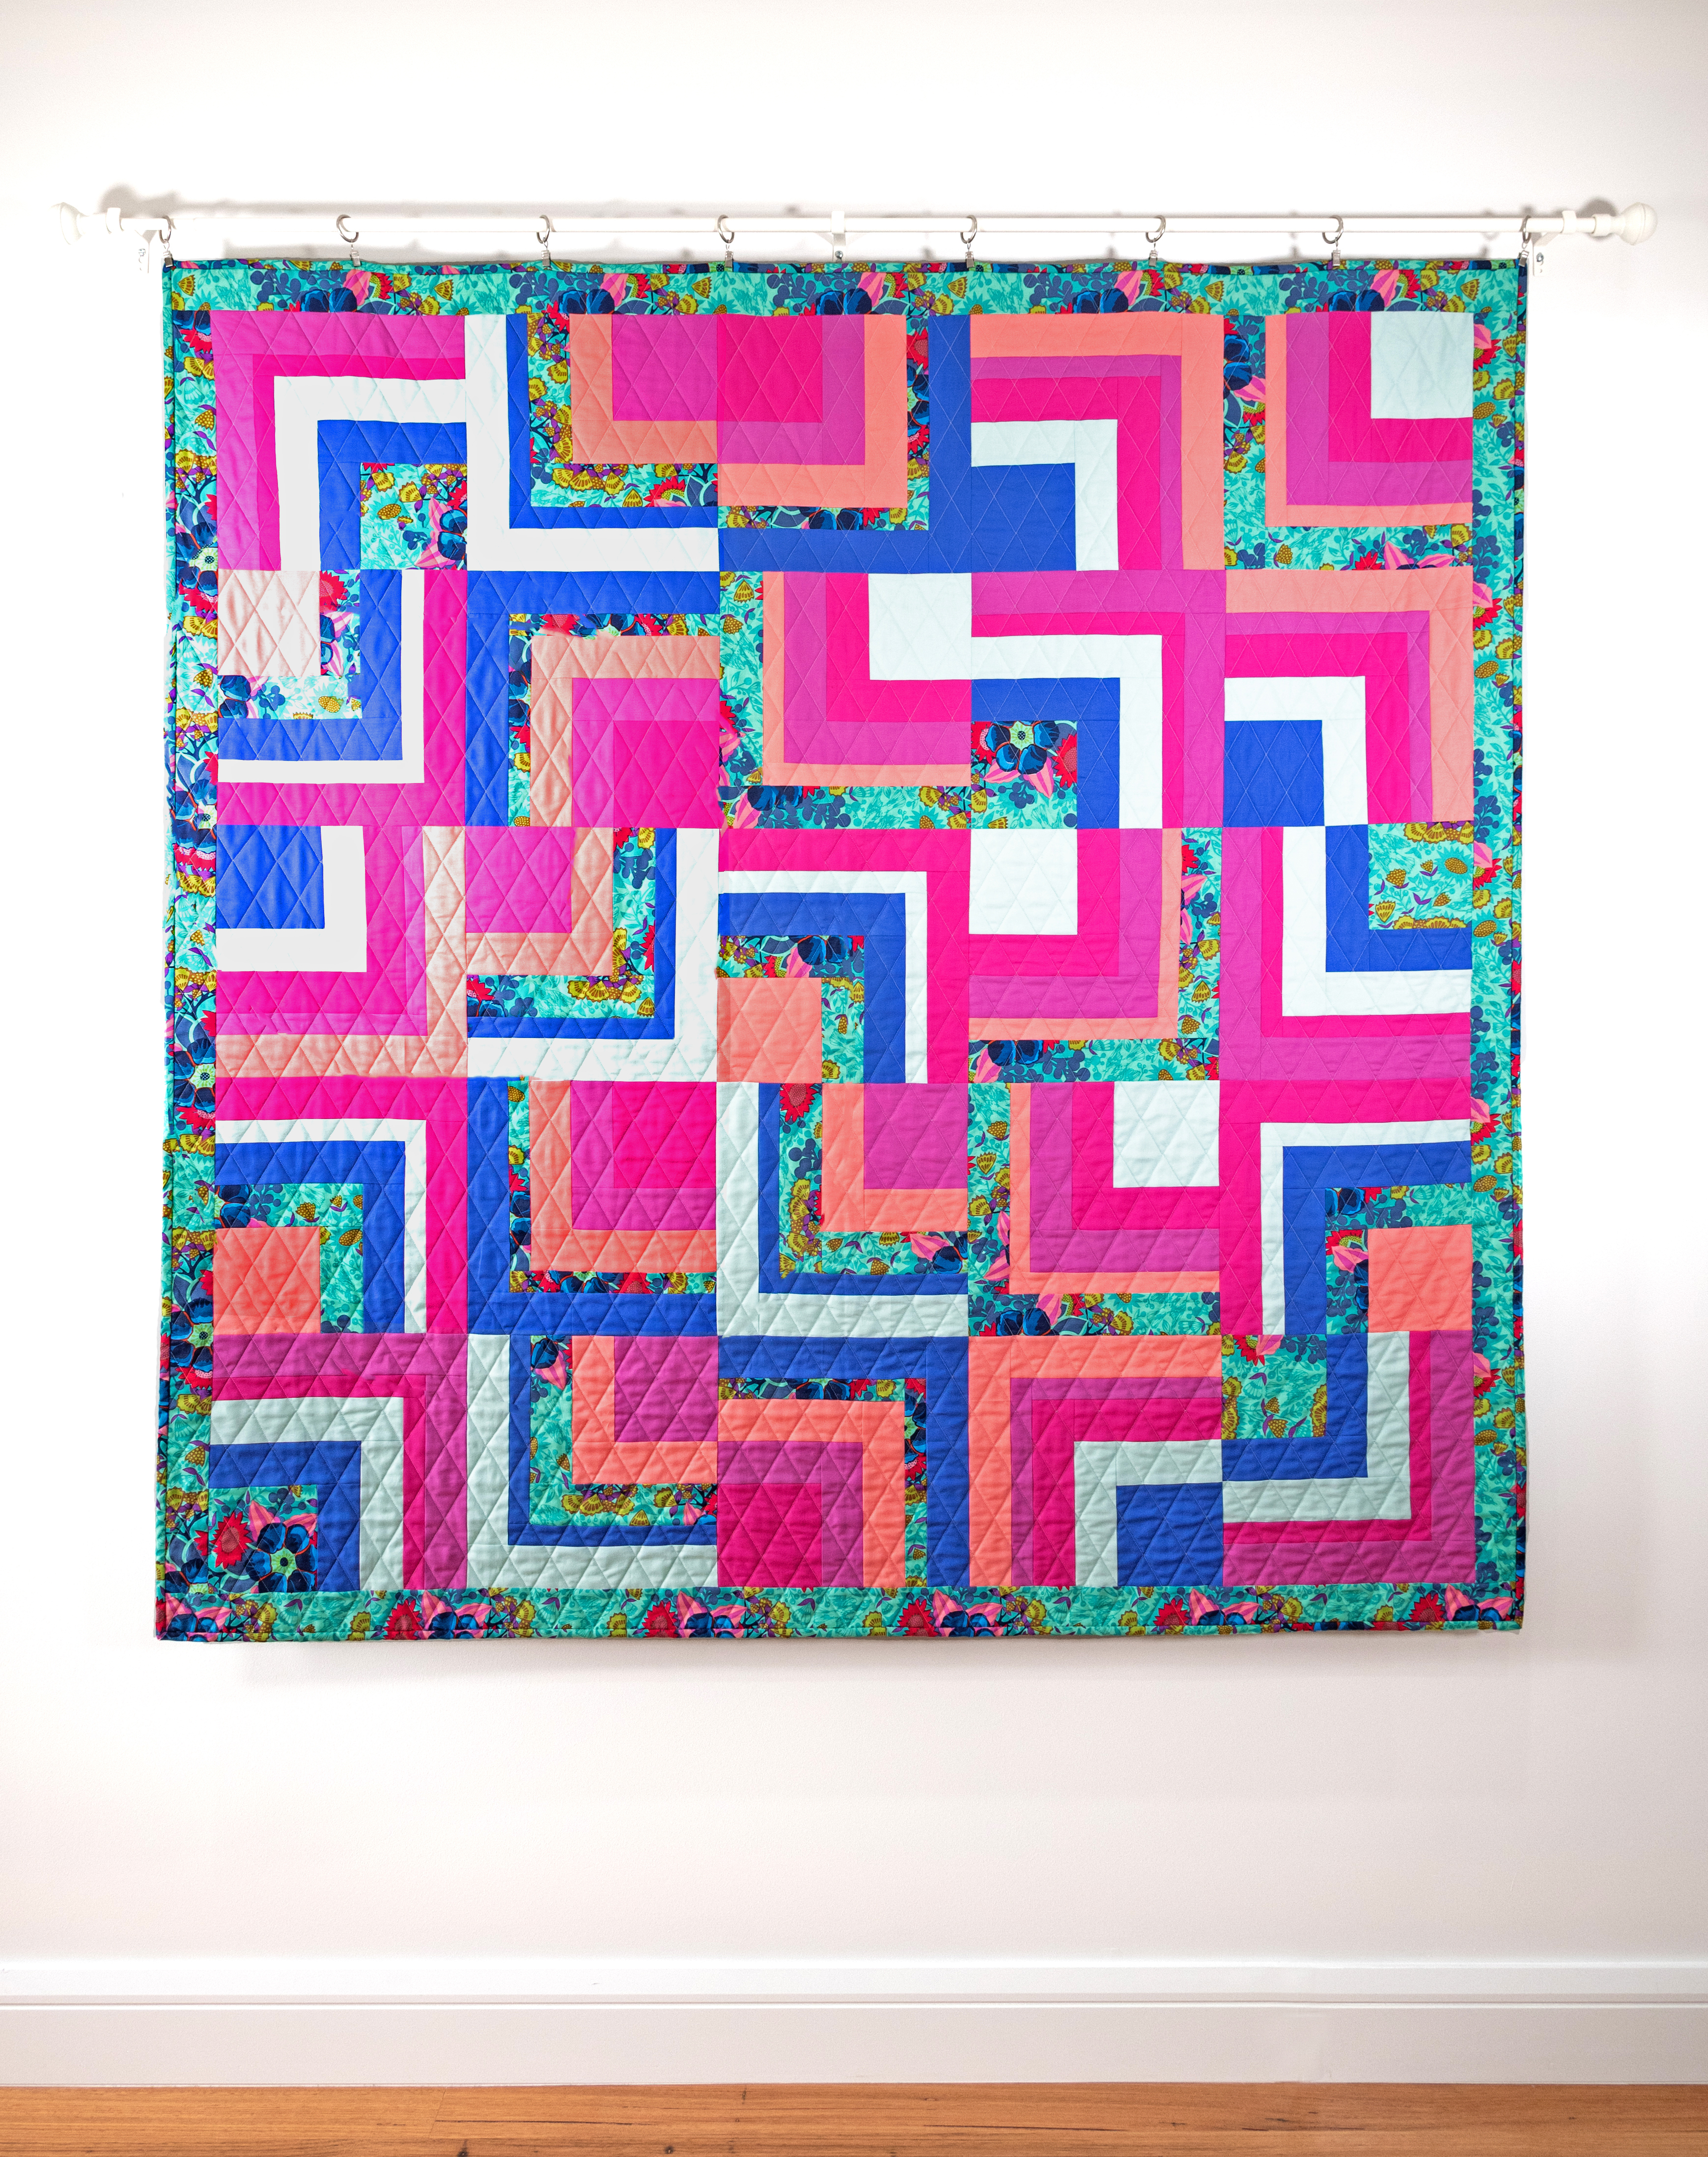
If you love big and bold designs that come together in a flash, then the Log Cabin Toss Quilt is just perfect for you. This new design was so fun to create and I couldn't just stop at making one sample and ended up making 3, it was so addictive.


For this version I made it with the Anna Maria Horner Print - "Piecework" in Sea, from her Hindsight Collection and then paired it with matching Tula Pink Solids.  You can choose to feature one print style fabric or make it from any fabric collection you choose.


There is even a Bonus Scrappy Block option, so this makes it the perfect quilt to make a dent in your scrap bucket. 

The pattern comes in 3 sizes - Baby Quilt 40.5in x 40.5in (103cm x 103cm), Lap Quilt 64.5in x 64.5in (164cm x 164cm) and a Queen Quilt 88.5in x 88.5in (225cm x 225cm). Great for the confident Beginner.


And I said I couldn't just stop at one Log Cabin Toss - here is the version that I made using Melody Millers Stay Gold Collection and Sarah Watts upcoming Twirl collection.  I absolutely adore this floral.  All of these fabrics are for Ruby Star Society. 


The unique construction method for this design will have you surprised just how quickly this design works up and will be ready to snuggle under even sooner. This isn't just any ordinary Log Cabin block you have made before.


And here is the third version I worked up using Anna Maria Horners "Clippings" in Charcoal from her Love Always Collection and again paired with matching Tula Pink Solids.


Definately next up on my list is making a scrappy version.  In the pattern there is a scrappy Block pattern for you to make up so that you can make a big dent in your scrap bucket.

You can get lots of inspiration for the Log Cabin Toss Quilt at the hashtag - #logcabintossquilt.  My pattern testers have made the most amazing versions and you will see lots of different fabrics, colours and textures used and how great they all look.  

The Log Cabin Toss Quilt PDF pattern is here.

Or you can get it in Paper format here as well

For wholesale customers the Log Cabin Toss Quilt is available through Creative Abundance.

I hope you enjoy making the #logcabintossquilt as much I have loved designing this pattern.  I am so excited to see the version that you make so make sure to tag me @tiedwitharibbon and use the hashtags, #logcabintossquilt and #tiedwitharibbonpatterns

Happy Quilting

Jemima x x
Tuesday, June 14, 2022

The Halo Cowl Pattern Release


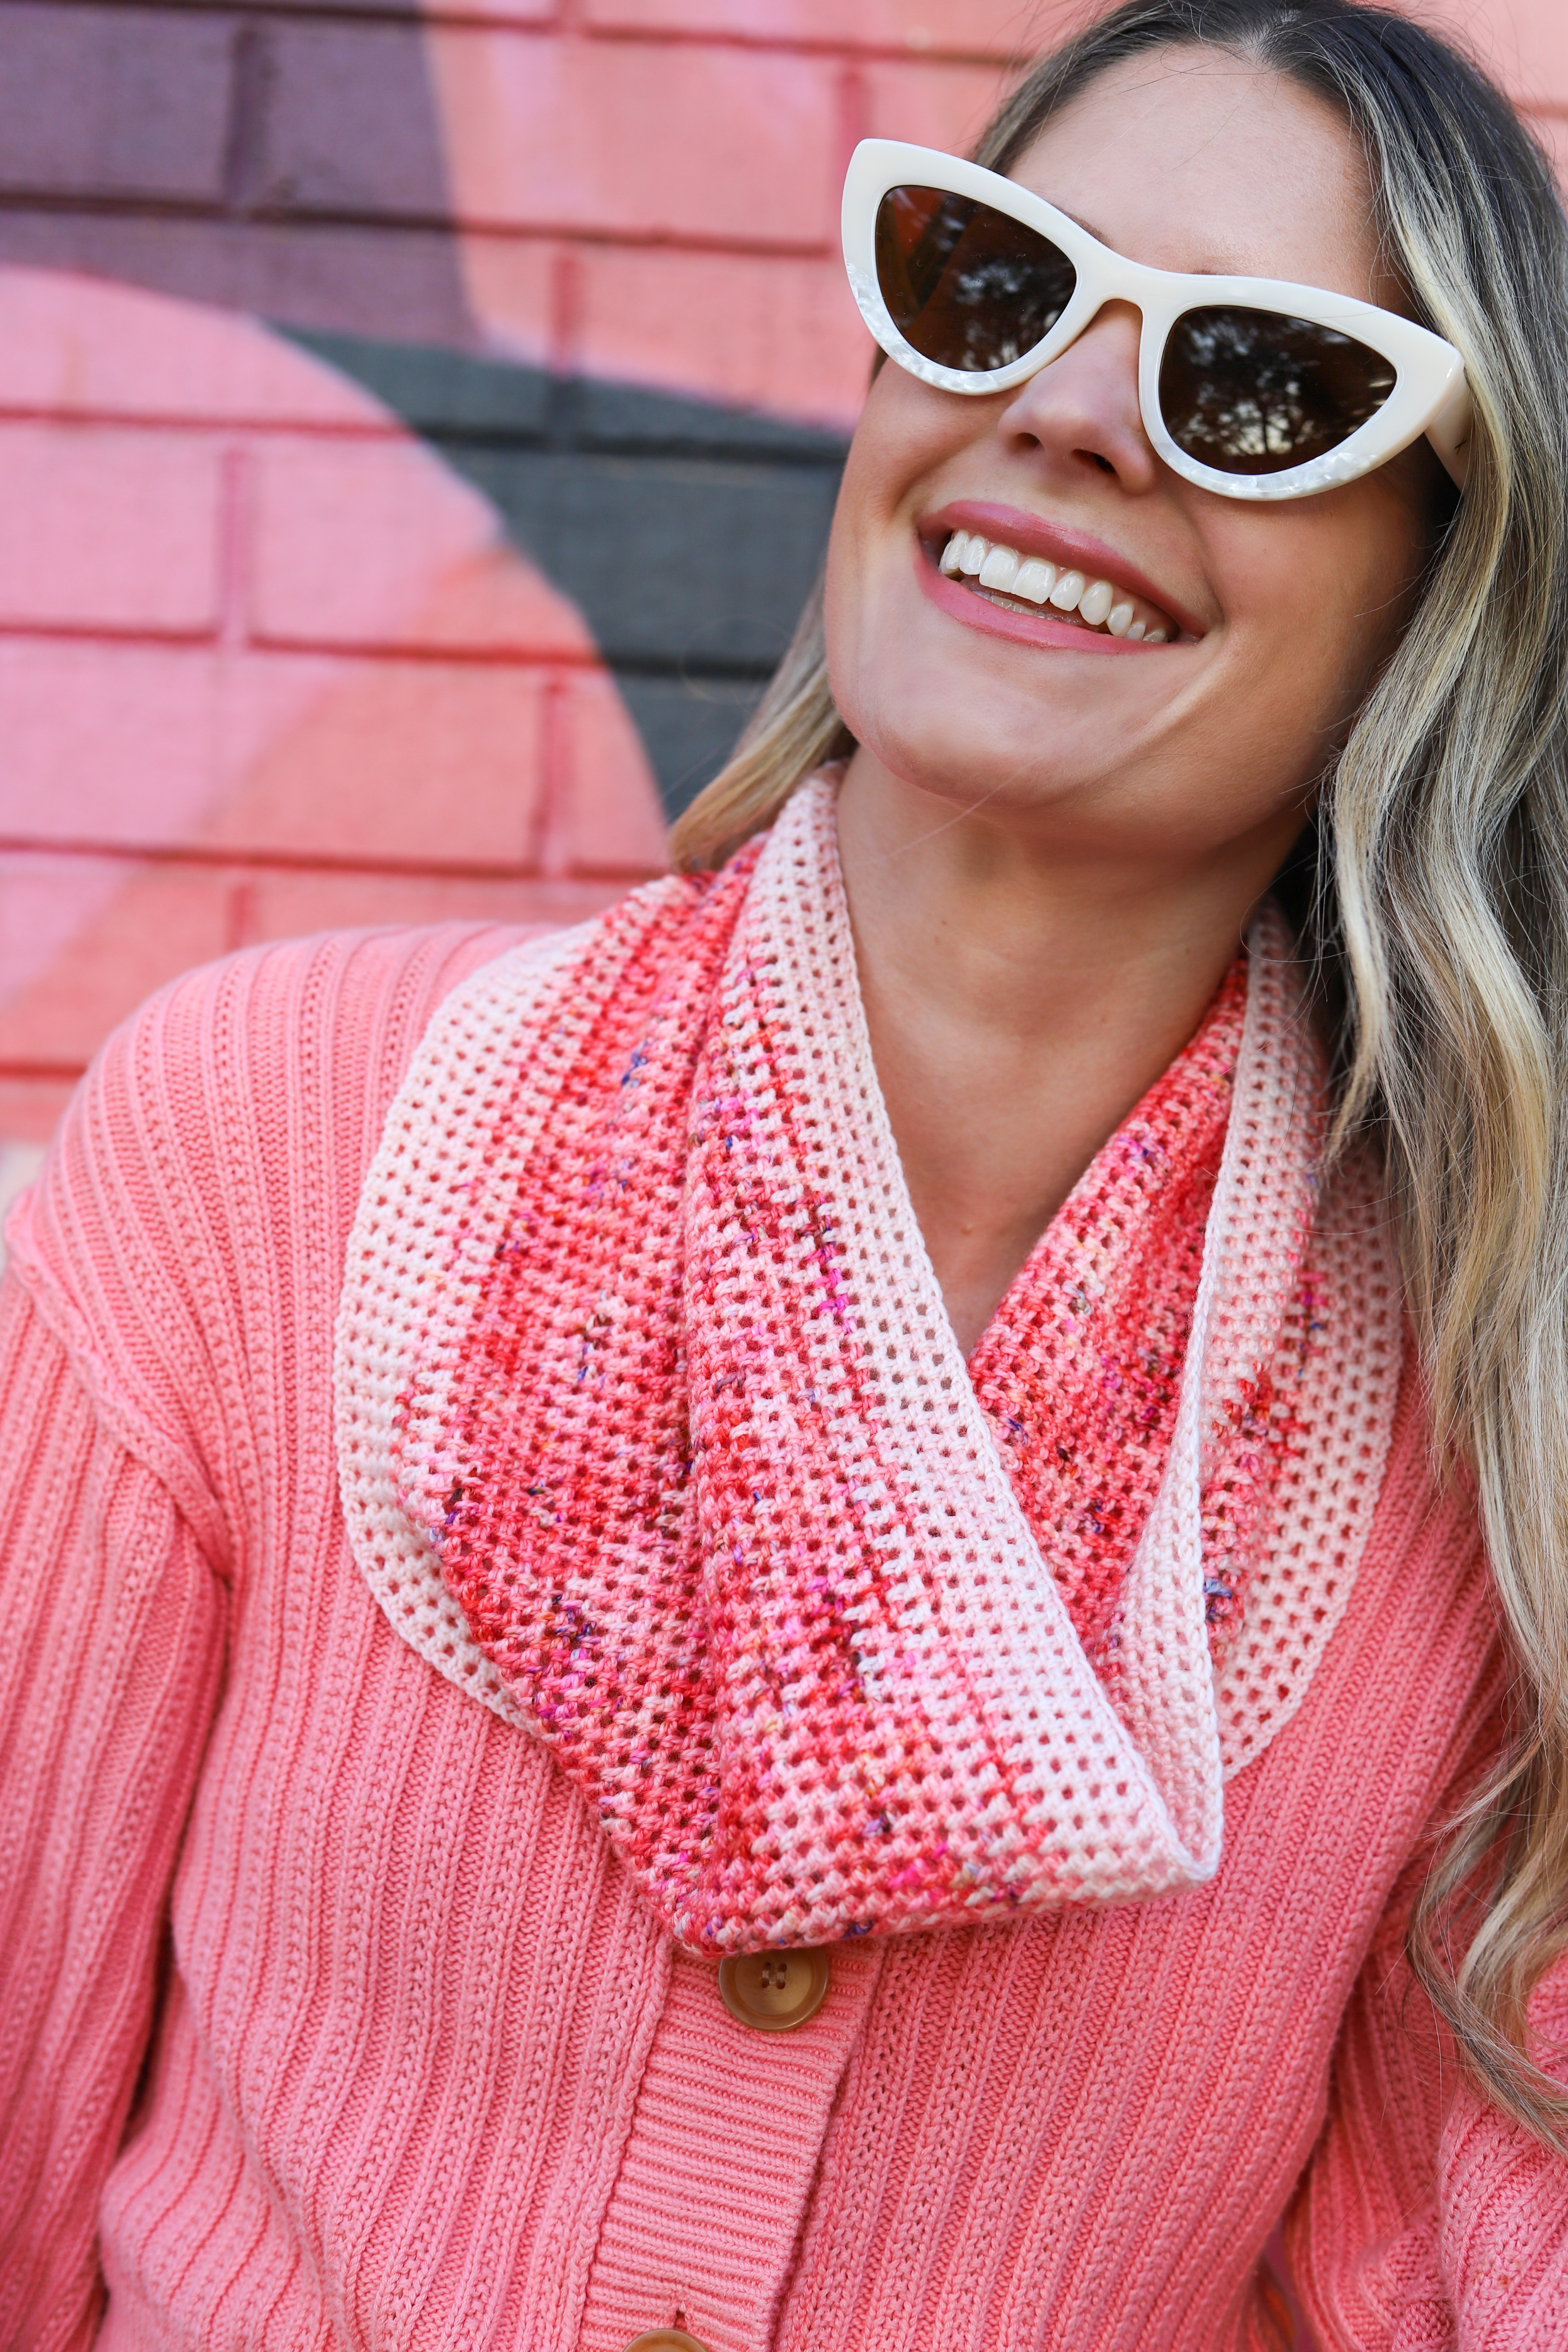
Introducing the Halo Cowl.  This Cowl has been on my "To Design" list for a long, long time.  And I am so excited with all the different versions that I could not stop crocheting up myself. I am beyond thrilled to now have it added to my Crochet Pattern Catalogue.


The Halo Cowl is crocheted using Sock Yarn in two different colours.  One for the Trim and the other for the Main.  This is great if you have some scrap yarn left over or have even got a Sock Set sitting in your stash.  It also means that you can make it up with any Sock Yarn (or Fingering weight yarn)


The Halo Cowl works up so quickly, is super addictive and are great to make for gifts or to keep for yourself.  I love the short cozy style of this Cowl that works perfectly to sit within your jumper or jacket neckline keeping you warm without the bulk.


You can easily adapt the pattern to any weight yarn, or just use a single colour or even a variegated yarn.  Even make this Halo Cowl longer if you choose (the maths for how to make this smaller or larger is given in the pattern instructions).


Wholesale customers can purchase the Halo Cowl through my Distributors - 

The Halo Cowl will also be popping up soon in all the best Local Quilt and Yarn stores.


I cant wait to see the #halocowl that you make.  Please add the hashtags #halocowl and #tiedwitharibbonpatterns to your posts and tag me - @tiedwitharibbon so I can see your beautiful Halo Cowls that you make.

Jemima x x 

Related Posts Plugin for WordPress, Blogger...