Sunday, August 28, 2022

Log Cabin Toss Quilt Along - Week 3

Week 3 of the Log Cabin Toss Quilt Along is here.

Here at the halfway mark and very excited to see that by the end of this week your Quilt Tops will be all ready to sewn together in week 4.


It is amazing to see lots of Quilts starting to come together and all these beautiful fabric choices becoming gorgeous Log Cabin Toss Quilt tops.


This week we are working on cutting up all of your blocks and arranging them.


This is where the magic of this quilt begins to show.  Taking each of your completed blocks you are going to carefully follow the instructions for how to cut these into the required smaller blocks ready for construction.


When it comes to arranging them – take your time.  You can follow the block orientation as I have done, or you can change it up to suit your fabrics and colours. Don’t be afraid to rotate a block if you have colours that are next to each other and aren’t working out as you planned.  


So this week’s task is to post a pic to Instagram using the hashtags #logcabintossqal,#logcabintossquilt and #tiedwitharibbonpatterns of you cutting up your blocks together or some of your blocks all sewn and arranging them.  Get creative, I have loved seeing the posts and reels you have been putting up so far.  It helps to tag me - @tiedwitharibbon to make sure I see your post and of course your Profile has to be set to Public for me to see it.  


Happy Quilting

Jemima x


Get organised for your next quilt project with these Swatch cards.  Keep all the details listed of your project, take this card easily to the fabric shop if you need to purchase more fabric for you project, see all your colours together. 

Sunday, August 21, 2022

Log Cabin Toss Quilt Along - Week 2

Week 2 is here of the Log Cabin Toss Quilt Along and it has been so inspiring to see all the Fabric Pulls all ready in anticipation of being made into a quilt.


What an amazing start we have gotten off to with the Log Cabin Toss Quilt Along - it is so exciting to see so many fabric pulls and cut out quilts block pieces showing up already.  I am seriously in love with lots of these that they make me want to make another one - or ten!  Have you checked out the #logcabintossqal and #logcabintoss hashtags?


If you are wanting to join in - it's not too late at all (you can join in at any point). To participate all you need to join in is:


1. Get the Log cabin Toss Quilt pattern here


2. Sign up for the Newsletter here  


3. Post your pics from the weeks prompts on Instagram to #logcabintossqal#logcabintossquiltand #tiedwitharibbonpatterns.  It also helps to tag me - @tiedwitharibbon to make sure I see your post.


You can get all the details for the Log Cabin Toss Quilt Along Week 1 here


Now that you have chosen and cut out your fabrics, this week you are going to be working on making blocks.  


Tips for sewing on the strips


Pinning


Log Cabin blocks are notorious for one thing – as you add each side the block can start to become wavy and vary in the size which is highly noticeable as you go to add the next strip. The thing with log cabin blocks is to treat them exactly the same way as adding borders to a quilt.


Before you sew a strip to the log cabin block, fold the strip in half (so the short ends meet) and finger press a crease at the centre length, then fold the side of the block you will be sewing the strip to in half and finger press a crease.  Before you pin the strip to the block, line up and pin the marks and pin the top and bottom of the strip.  This will ensure the strip is evenly distribute along your block so it will sit nice and flat and not stretch as your block grows.


You can see this reel here I made about adding borders and the concept is exactly the same for log cabin strips (there is no need to measure the sides however for your log cabin blocks).


Setting your seams

Be sure to set your seams when pressing to ensure nice and straight sewn lines.  


Do you ever have trouble with your seams being wonky after pressing? 
Here is a simple tip for straight seams every time. 

1. Press the seam first as you have sewn it. 

2. Then press your seam in the direction you want it to lay.

This is called “setting your seams” and allows the top and bobbin thread to lock within the fabric from pressing, making for a much straighter seam. 


So this week’s task is to post a pic to Instagram using the hashtags #logcabintossqal,#logcabintossquilt and #tiedwitharibbonpatterns of you sewing your blocks together or some of your blocks all sewn.  Get creative, or even your cut fabrics all laid out beautifully.  It helps to tag me - @tiedwitharibbon to make sure I see your post and of course your Profile has to be set to Public for me to see it.  


Happy Quilting

Jemima x 

Sunday, August 14, 2022

Log Cabin Toss Quilt Along - Week 1

Welcome to week 1 of the Log Cabin Toss Quilt Along.  I am so excited you will be joining in.


Designed to be fun, casual and relaxed so that you can work through making your very own Log Cabin Toss quilt over the coming 5 weeks - I am looking forward to having you join in. Everything you need to get you started is here along with the Schedule for the coming 5 weeks.


If you are wanting to join in - it's not too late at all (you can join in at any point). To participate all you need to join in is:


1. Get the Log cabin Toss Quilt pattern here


2. Sign up for the Newsletter here  


3. Post your pics from the weeks prompts on Instagram to #logcabintossqal#logcabintossquiltand #tiedwitharibbonpatterns.  It also helps to tag me - @tiedwitharibbon to make sure I see your post.


This week is all about choosing and deciding which fabric you will use to make your Log Cabin Quilt as well as getting it cut up.  Make sure to check out the #logcabintossquilt hashtag for inspiration.


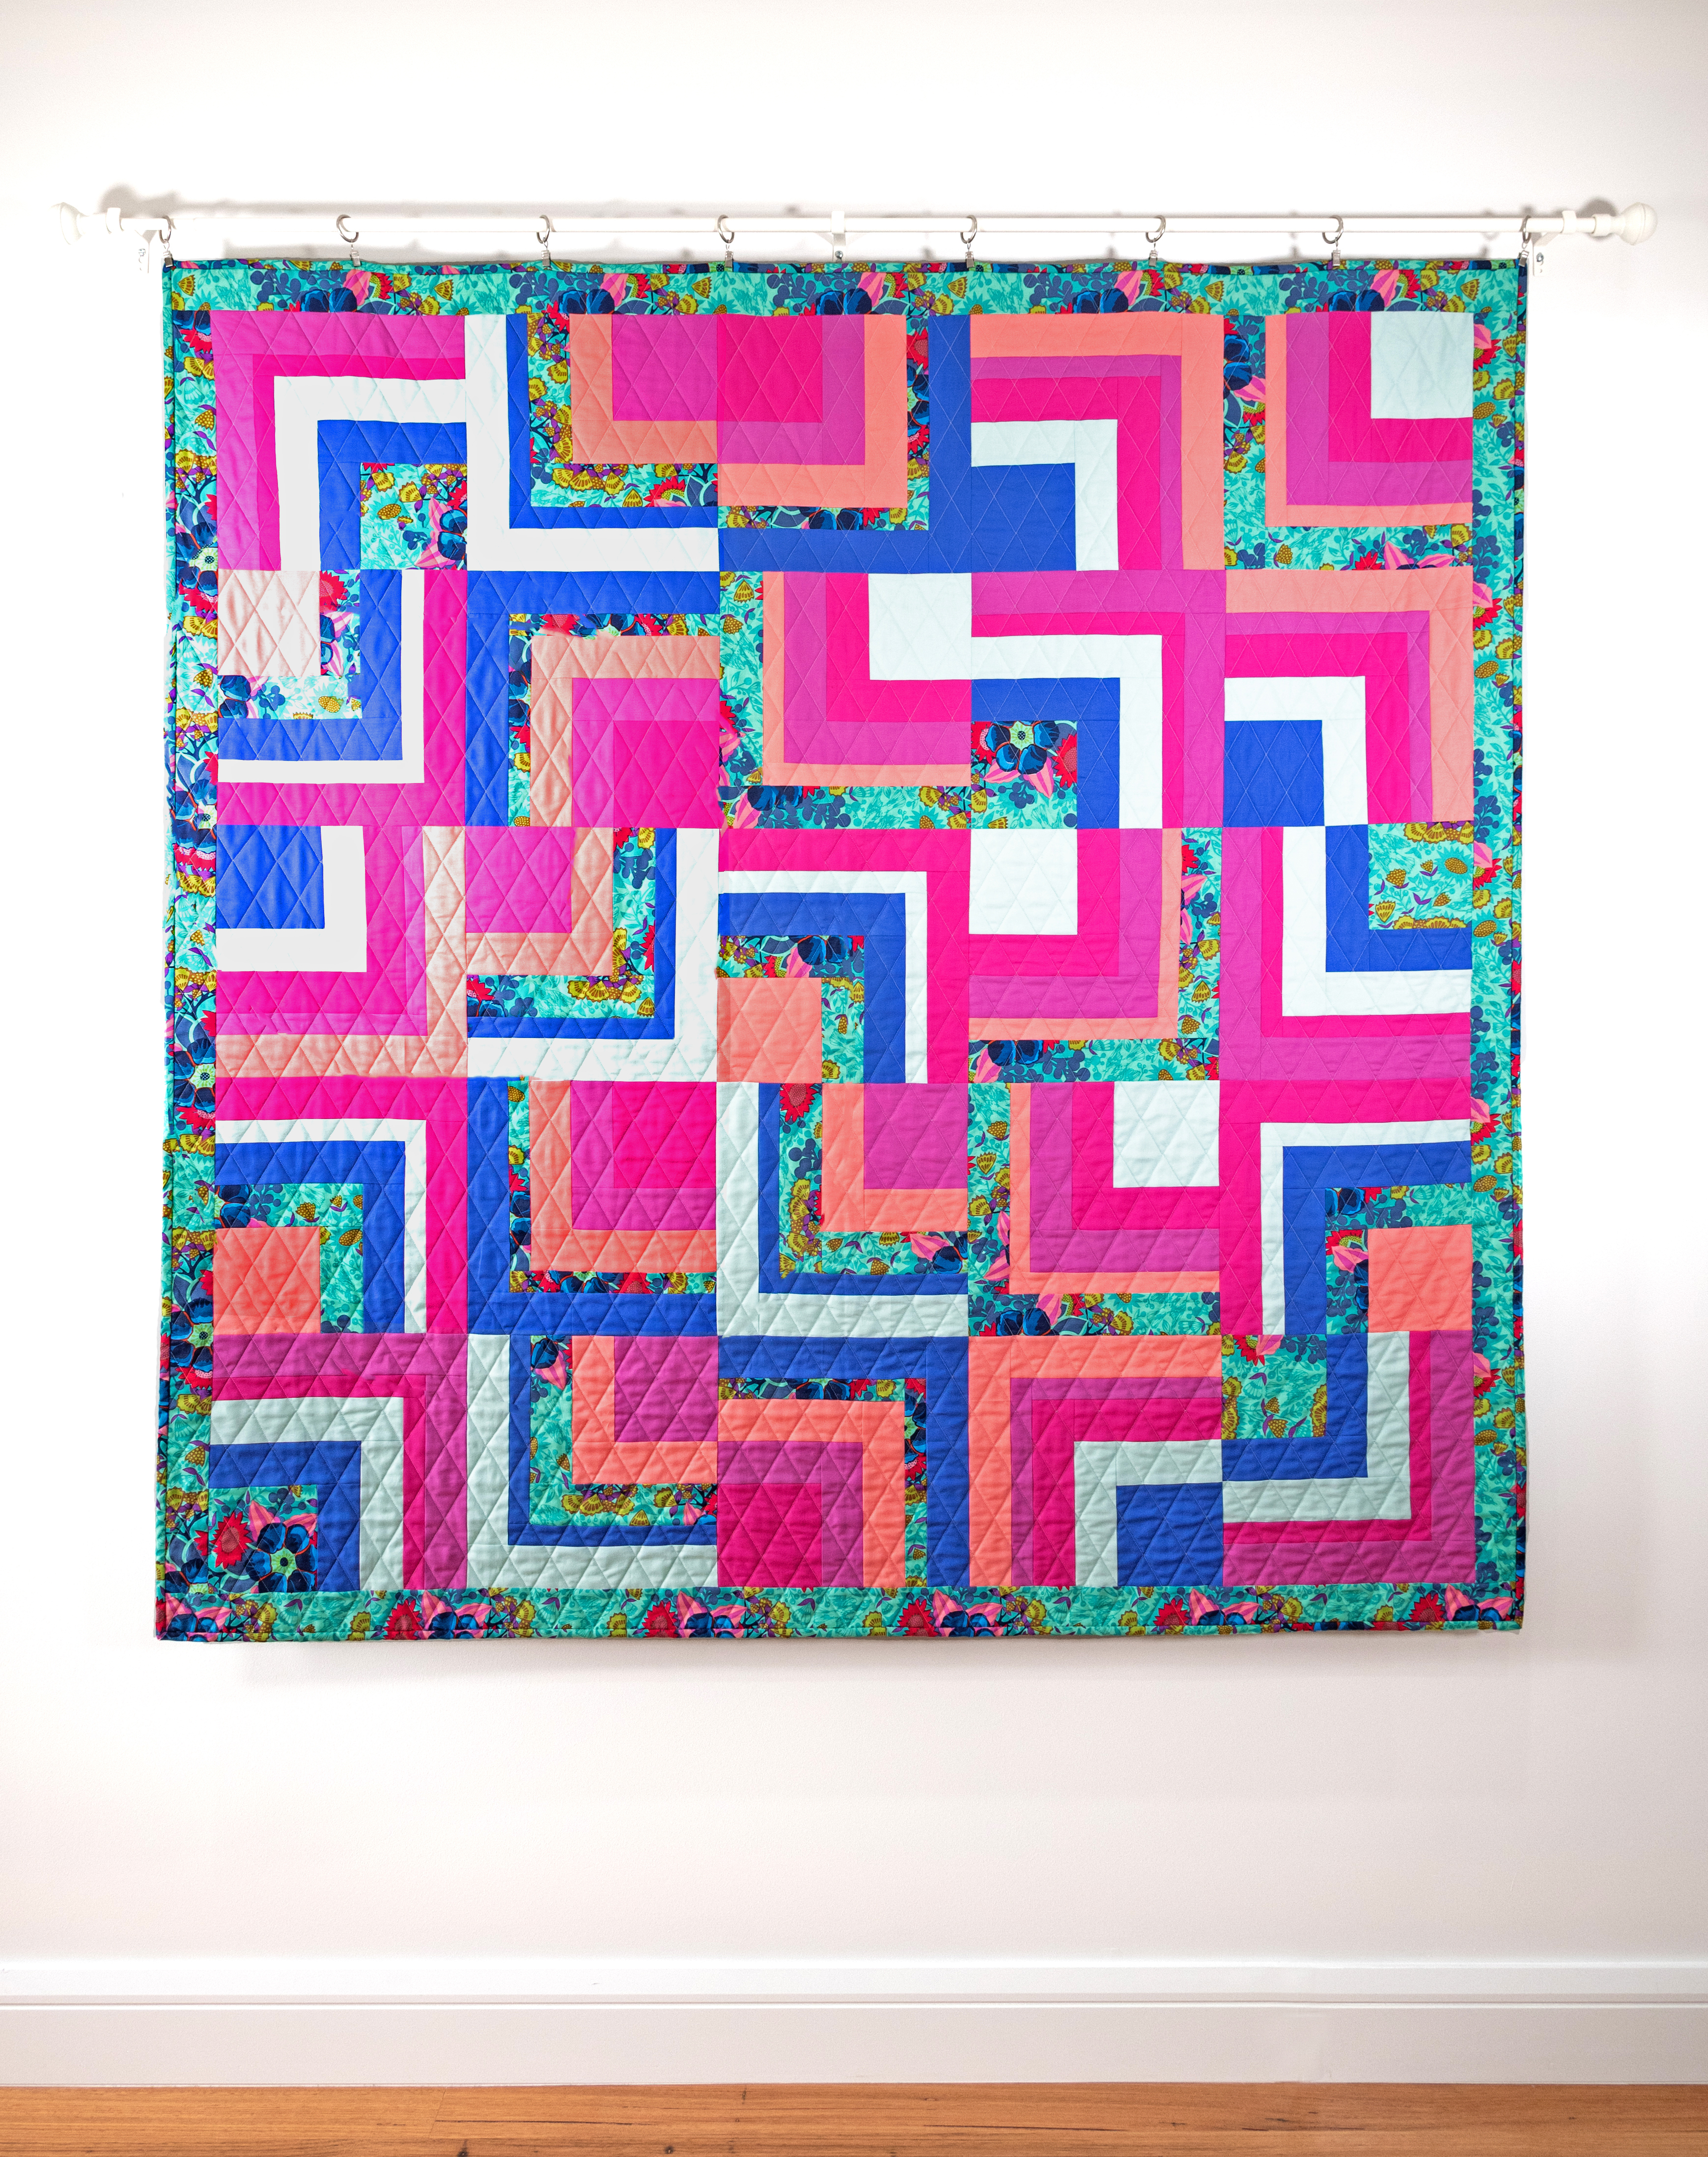
Week 1 - Selecting your Fabric

This weeks task is all about selecting and choosing the fabric you would like to make your Quilt from. Post a pic to Instagram, using the above hash tags of your fabric pull or quilt planning to show us what you will be making your Log Cabin Toss Quilt from and to be in the running for this weeks prizes.


This is where the sky is the limit - whether you choose Solids or Prints this quilt works.  You can grab fabrics from your stash or use a collection.


Make sure you check out my last Blog Post – here you will find my tip for how I chose the fabrics for my Log Cabin Toss Quilt.


You can also see here in this Reel I made how I do this.


Prints

For this quilt - multi directional prints work best and are easiest.  Geometrics work well as well as smaller scale prints.  Florals and novelty fabrics are especially good for this quilt.  


Solids

Solids work so well for this Quilt and the choices of different Fabric Company Solids is huge.  One way to do this is head over to Pinterest and search Colour Palettes - this gives you lots of boards with a selection of colours already that co-ordinate and work well together.  From here you can pick and choose solids for any colour palette you like.


Scrappy

This design also works perfectly to pull fabrics from your stash if you want to go with a scrappy vibe.  You will really make a dent in your scrap bucket with this quilt. 


Cutting your Fabric

Now that you have chosen your fabrics, this week is also all about cutting into them.  


So this weeks task is to post a pic to Instagram using the hashtags #logcabintossqal,#logcabintossquilt and #tiedwitharibbonpatterns of the fabrics that you intend to use for your own Two Hearts Quilt or maybe them cut up.  It could be you planning out your choices or a lovely bundle of what you have chosen - get creative, or even your cut fabrics all laid out beautifully.  It helps to tag me - @tiedwitharibbon to make sure I see your post and of course your Profile has to be set to Public for me to see it.  


I'm so excited to see what fabrics and colours you are choosing - no matter what you go with these will look bold and beautiful in this modern design.


Happy Quilting

Jemima x 

Tuesday, August 9, 2022

The easiest way to choose fabric for a quilt


Here is my tip for the easiest way to choose fabric for a quilt.  This will really help grow your colour confidence.

Choosing fabric for a quilt can be a daunting task. This tutorial will show you how to choose fabric for a quilt easily and in no time at all!


Quilts can take a long time to make but we do it because we love it, right? No matter how much you love something though, nobody wants to spend hours making a quilt only to find the colours and patterns of the fabrics you chose don’t quite work together. It can be very disappointing!


Curating a collection of fabric with colours and prints that work together doesn’t have to be a difficult or time consuming task if you follow these simple steps.


Step 1 - Choose your Backing fabric first and use this as your inspiration fabric. You can see here in this pic above that I started with this gorgeous Art Gallery Floral Print for my backing fabric.  It contains lots of beautiful colours that I know will work well for the fabrics for the quilt top.


Step 2 - Then from your stash or at your LQS use the colours within the print to choose the fabrics for the Quilt top.  You will also find along the selvedge of most prints a colour guide (these can be circles or little motifs that show each colour used in the fabric)


Step 3 - You can see here how I chose this gorgeous floral print first. Then I worked to pull matching colours found in the design of the leaves and flowers. With the beautiful design, the colour palette is done for you so it makes it much easier to choose fabrics for your quilt with an idea of what already works together.


You can also see here in this Reel the process.


This technique works both at home and in-store. The good thing is that it’s fast, which means if you’re strapped for time you can duck out to your favourite quilt shop and be home again cutting up fabric before you know it.


If you’re online shopping it may be hard to make sure the colours of the fabrics are right for each other. One way to get around this is by sticking with one fabric designer and working across collections.


Check out these patterns that I have designed using this exact process.


Happy Quilting

Jemima x 
Related Posts Plugin for WordPress, Blogger...